18 April 2020

Back in the day...


Blunder Prone, one of the Chess Blogs That Used to Be Good (and might be again), has resurfaced with a thoughtful post on slow vs. fast training and sharing some old school techniques in that regard. I also admit I have to grin whenever a post starts with "Back in the day..."

17 April 2020

Annotated Game #240: Why you should check tactics before resigning

This second-round tournament game is a tale of unrealized compensation, psychological pressure and a final missed tactic. The annotations speak for themselves, in terms of the lessons.

[Event "?"] [Site "?"] [Date "????.??.??"] [Round "?"] [White "Class A"] [Black "ChessAdmin"] [Result "1-0"] [ECO "D05"] [Annotator "ChessAdmin/Komodo 13.2"] [PlyCount "61"] 1. e4 c6 2. d4 d5 3. exd5 cxd5 4. c4 {going for the Panov-Botvinnik Attack, rather than the Exchange Variation} Nf6 5. Nc3 e6 6. Nf3 Be7 7. cxd5 Nxd5 8. Bd3 Nc6 9. O-O O-O 10. Ne4 $5 (10. Re1 {is overwhelmingly played here, and what I had prepared for.}) 10... Nf6 {this is a standard move against 10. Re1, but here scores quite poorly for Black. I thought for a while and didn't think there was anything better.} (10... b6 {has been played in master games and seems to be a straightforward way to equalize.}) (10... f5 $5 {is an interesting thought that occurred to me and also has been played a few times.} 11. Nc3 (11. Ng3 Bd7 $11) 11... Bf6 {and Black is a little cramped, but the e-pawn will be hard to crack while defended by the bishop and White will have to prove he can make progress.}) 11. Be3 b6 {this is where the problems start for me. Basically this is an unintended pawn sacrifice, that I get compensation for, but it's still unwelcome.} (11... Nb4 $5) 12. Nxf6+ Bxf6 13. Bxh7+ Kxh7 14. Qc2+ {forking the king and the unprotected Nc6.} g6 $6 {this is the real problem for the rest of the game and what gives White an advantage. I had thought that the rook on the open h-file would compensate for the dark-square holes, but this turns out not to be the case.} (14... Kg8 {Komodo considers this essentially equal.} 15. Qxc6 Rb8 {and after ...Bb7, Black has a pair of very good bishops (especially the unopposed light-square one on the long diagonal) and pressure on the isolated d-pawn, with d5 controlled in front of it. This was the general idea I also had in the game continuation, but it goes wrong.}) 15. Qxc6 $16 Bd7 $2 (15... Rb8 {as given in the previous variation is still the way to best develop the bishop, however awkward it looks. Unfortunately the bishop never really gets in the game after the text move.}) 16. Qe4 $146 {from here on, the pressure simply continues as White has the initiative and a clear pawn to the good.} Rc8 17. Qf4 {I could not figure out how to deal with this and tried to play more actively.} Rh8 $6 (17... Kg8 { emphasizes the holes on the kingside and shuts out the rook, but White is not in a position to immediately break through.} 18. Ne5 Bg7 $16) 18. Ne5 Kg7 19. Rac1 {bringing another piece into the game.} Rh5 {at least I'm continuing to play actively with pressure along the 5th rank, which likely contributes to White's next choice.} 20. Nxd7 $2 {this releases a lot of the pressure. Just about any normal move is fine for White here.} Qxd7 21. Rxc8 Qxc8 22. Rc1 Qa6 $2 {an error due to materialism. I'm focusing far too much on the one pawn material deficit, which Komodo assesses I mostly have compensation for, rather than on defending my position. The threats to the a-pawn and to penetrate on the diagonal are not real, while my queen effectively isolates herself from the rest of the action.} (22... Qd7 $5 23. Rc7 {appears to just drop another pawn, which is why I avoided it. However if} Qd8 24. Rxa7 e5 $1 {and White has a back-rank problem, so the d-pawn falls in turn.} 25. Qe4 exd4 $14) (22... Qa8 {would be an OK defensive move.}) (22... Qd8 {would set a trap:} 23. Rc7 $2 e5 $1 $19) 23. g4 Rh4 {with the idea of gumming up White's kingside offensive. However, White could play Qf3 and clear the awy for the g4-g5 advance.} (23... Rd5 $5) 24. Qg3 $6 Qe2 (24... g5 {would be the logical follow-up to the strategy of blocking White on the kingside. White cannot play} 25. f4 {because then the Black queen actually can penetrate to good effect with} Qe2 { threatening ...Rxg4.} 26. h3 $6 gxf4 27. Bxf4 Bxd4+ $17) 25. h3 {White blocks the one-move threat and now is well-positioned to take me apart.} Rh8 { anticipating the next move, but blocking it with my own pawn would still be better, even if no real solution.} 26. g5 Bd8 27. d5 $18 Qxb2 {at this point I'm just hoping that White blunders. Regaining material equality is meaningless.} 28. dxe6 fxe6 29. Qd6 Kf7 30. Qf4+ Ke8 31. Bd4 $2 {and White does in fact blunder, but I miss it! Any queen move loses, which I thought was the only defense, but the rook sacrifice on h4 is a saving deflection tactic, as the White queen is overloaded and cannot protect the Rc1 and Bd4 afterwards.} 1-0

08 April 2020

Anand and other Indian GMs playing online charity simul

This Saturday (11th of April) former world champion Anand and other top Indian GMs will be playing an online simul at Chess.com to raise money for fighting the coronavirus. It's taking place at a US/Europe/Asia friendly time and simul participants will start with a 45 45 clock rate, so it's a great opportunity to get in a serious game with serious players.

Full story and signup details: https://www.chess.com/news/view/viswanathan-anand-covid-19-message

04 April 2020

Annotated Game #239: Not a Hedgehog

This first-round game was a typical tournament start for me, featuring somewhat poor quality of play early on, but I was able to hold on long enough against a lower-rated opponent until I could generate some counterplay and finally break through. My opponent played well for most of the game, despite entering a dubious opening line (6...d5) that went against the Hedgehog structure just established on the previous move. I could have taken better advantage of this, however, and ended up allowing her to obtain a superior position in terms of space and piece activity. Most of the rest of the game consisted of me responding to threats in a relatively passive way, but the tide began turning around move 30, when I obtained some activity of my own and forced my opponent to have to respond to threats - thereby giving her a chance to go wrong, which she eventually did. One of the main lessons from the game analysis, other than from the opening phase, was how important (and effective) piece activity is in the endgame, especially when rooks are on the board. The other one, which tripped up my opponent in the end, was the decisive power of a more advanced passed pawn.

[Event "?"] [Site "?"] [Date "????.??.??"] [Round "?"] [White "ChessAdmin"] [Black "Class D"] [Result "1-0"] [ECO "A30"] [Annotator "ChessAdmin/Komodo 13.2"] [PlyCount "109"] 1. c4 e6 2. Nf3 b6 3. g3 Bb7 4. Bg2 Nf6 5. Nc3 c5 {entering a Hedgehog structure. However, Black immediately violates this with her next move.} 6. O-O d5 {while general principles suggest it is good to occupy the center with a pawn, in this case it is one too many pawn moves in the opening. Black's idea and threat is to continue the pawn advance with ...d4, but White can combat this in multiple ways, the simplest being to exchange the c- and d-pawns.} 7. Ne5 $5 {this prevents ...d4 due to the hanging Bb7 and occupies a central outpost. However, White's advantage is less concrete here.} (7. cxd5 Nxd5 (7... exd5 8. d4 $16 {is even better for White, as the Black d-pawn is a useful target.}) 8. d4 $14 {White is ahead in development and has better control of the center.}) 7... Nbd7 8. f4 $146 {the idea here is to support the outpost on e5 and open the f-file if Black exchanges. Although less pressing than the main line, as some consolation Komodo puts it as its second choice.} (8. Qa4 $14 {is universally played in the database and is probably the most active way to continue, as in the following example game.} Bd6 9. Nxd7 Qxd7 10. Qxd7+ Kxd7 11. Rd1 Rac8 12. cxd5 Nxd5 13. Nb5 Bb8 14. d4 cxd4 15. Nxd4 Ke7 16. e4 Nb4 17. Bd2 Na6 18. Bg5+ f6 19. Be3 Nc5 20. f3 Na4 21. Rd2 Be5 22. Bh3 Bxd4 23. Bxd4 Rc7 24. Rad1 Bc8 25. e5 f5 26. Bf1 Bd7 27. b3 Nc5 28. Bxc5+ bxc5 29. Bc4 Rb8 30. Rd6 Rb6 31. Kf2 Bc8 32. Rxb6 axb6 33. Rd6 Rb7 34. Ba6 Rb8 35. Bxc8 Rxc8 36. Rxb6 c4 37. Rb7+ Kf8 {Bayaraa,Z (2194)-Bryant,J (2359) Dallas 2009 1-0 (83)}) 8... Bd6 $11 {an obvious response, developing the piece and pressuring e5 again.} 9. Nf3 $6 {this betrays a lack of imagination and failure to take into account the dynamic factors in the position.} (9. cxd5) (9. Qa4) 9... O-O { Black is in a hurry to castle and prevent the position being opened with her king in the center, which of course is not a bad idea.} (9... dxc4 {would grab a pawn with little compensation for White, however.} 10. d3 cxd3 11. Qxd3 Be7 12. f5 exf5 13. Qxf5 O-O $17) 10. b3 {protecting the c-pawn while preparing to develop the bishop to the long diagonal. However, Black could now follow up on her previous idea to advance the d-pawn.} (10. d3 {would be comparatively better, not locking the dark-square bishop in after ...d4.}) 10... Re8 { a standard rook development, but this lets me repair the problem in the center. } (10... d4 $5) 11. e3 {taking control of the d4 square. The position is now equal again.} dxc4 12. bxc4 e5 {consistently following up with a standard idea of an e-pawn break supported by her pieces. However, I should have ignored it and continued to develop, as there is no actual threat.} 13. fxe5 {a premature exchange. It wins a pawn, but Black gets more than sufficient compensation.} ( 13. Nb5 $5 Bb8 14. fxe5 Nxe5 15. Nxe5 Bxg2 16. Nxf7 Kxf7 17. Kxg2 $11 {and now if} Be5 $2 18. d4 {is possible.}) (13. Bb2 exf4 14. exf4 $11 {in the game, I didn't like the idea of having a backward d-pawn, but Black has no way of getting at it soon. Also, my control of e5 in this variation is cramping for Black.}) 13... Nxe5 14. Nxe5 Bxg2 15. Nxf7 {this is the tactical point, a desperado maneuver that threatens the Qd8.} Kxf7 16. Kxg2 Be5 $15 {Black's pieces are much more active and my c-pawn is hanging, so my opponent in fact has a small advantage here.} 17. Bb2 {I need to get the bishop into the fight.} (17. Qc2 $6 {would attempt to cover both the c- and d-pawns, but would leave me with more weaknesses.} Kg8 18. Bb2 Qd7 $15 {now Black can increase pressure on the d-file and also threaten to swing the queen over to the weak light squares on the kingside.}) 17... Qd3 18. Rb1 {this seems like an obvious move and covers things reasonably well after the game continuation. The engine finds a more active continuation for Black, however, based ironically on retreating the king, which however frees up the Nf6.} (18. Qb1 $5) 18... Qxc4 ( 18... Kg8 19. Qe2 Rad8 $17) 19. d3 Qe6 {we're now back to rough equality, which could be solidifed by playing Ne4 and taking advantage of the continuing f-file pin. However, there are long variations involved. The text move is inferior, but more understandable, as it removes the threat to the e-pawn.} 20. e4 (20. Ne4 {and now if} Qxa2 21. Nxf6 Bxf6 22. Rf2 Qe6 23. Qh5+ Kg8 24. Rxf6 gxf6 25. Rf1 $11 {in a complex position.}) 20... Kg8 $17 {Black has more space, with better piece placement and coordination. Meanwhile, I have to try to fight against space cramp and get my pieces to better squares.} 21. Qb3 { I evaluated my queen as being inferior to Black's, so seized the chance to force an exchange. Black might do better by making me burn another tempo to complete it.} Qxb3 (21... Rad8 $5) 22. axb3 Red8 {this leaves the other rook on a8, which appears to be intended to support a future queenside pawn advance. However, this reduces the pressure Black has on the central files.} 23. Rf3 { this is more flexible than putting a rook on d1. The d-pawn cannot advance in any case.} Rd7 24. Nd1 {offering another trade.} Bxb2 25. Nxb2 {Black still has an advantage, but I feel that with fewer pieces on the board the problem is a little more manageable.} Ng4 (25... Rad8 $5) 26. Rd1 (26. Nc4 $5 {is a bid for more activity.}) 26... Rad8 (26... Ne5 $5 {would powerfully centralize the knight and allow Black to dominate in the long run.} 27. Rf2 Rad8 28. Rfd2 Kf8 $17 {and Black's king can enter the fray in the center.}) 27. h3 Nf6 $6 { thankfully (for me) missing the opportunity to move to e5.} (27... Ne5 28. Re3 Nc6 $19) 28. Re1 {made under the rule that rooks belong behind passed pawns. A good practical choice, perhaps, as Black would have to make some non-obvious knight maneuvers to effectively block the e-pawn.} (28. Ra1 $5 {with the d-pawn guarded, it would be better to get this rook active on the a-file.}) 28... Re7 {now the e-pawn is pinned, which did not really register with me.} ( 28... Ne8 {followed by moving to c7 is Komodo's preference, controlling the b5 and e6 squares.}) 29. g4 {played with the thought of moving the king up to g3, but this ignores Black's possible responses.} (29. Ra1 $5) 29... Rd4 { evidently played with the thought of following up with ...Rb4.} (29... Nd5 $1 { would take advantage of the e-pawn being pinned to transfer the knight to a better square, in this case b4.}) 30. Nc4 {physically preventing the rook from getting to b4. However, seeking active counterplay would be even better.} (30. Ra1 {it's interesting to see how piece activity really is the key to rook endgames. For example} Rb4 31. g5 Rxb3 32. Nc4 Ne8 33. Raf1 {and now despite beign a pawn down, White's domination of the f-file and more advanced passed e-pawn make it an even game, or even a win if Black fails to defend with} g6) 30... Nd7 31. Ref1 {around here I started feeling better about the situation. Although objectively Black still has a similar advantage, according to Komodo, I'm finally in the position of having potential threats and making my opponent react to my moves, rather than me having to constantly defend.} h6 32. Kf2 { getting the king into the action, with the intent of taking over defense of the d-pawn.} Kh7 $6 {the king is no safer here and this gives me a valuable tempo.} (32... b5 33. Ne3 Rxd3 34. Nf5 Rxf3+ 35. Kxf3 Rf7 36. Ke3 {and White is a pawn down, but with good chances to hold, thanks to the active king.}) 33. Ke2 $11 {the position is now balanced.} Nb8 34. Rf7 {still an even position, but psychologically a rook on the 7th adds to the pressure on my opponent.} Rxf7 35. Rxf7 Nc6 $2 (35... Rd7 $11) 36. Rc7 {the correct follow-up, driving the knight away from protecting the a-pawn.} Nb4 37. Nb2 $6 {too passive.} (37. Ne5 $16 {and the knight is gloriously centralized.}) 37... a6 38. e5 {my opponent now finds the runaway e-pawn difficult to deal with.} Nd5 39. Rf7 $6 { if I wanted to keep the rook on the 7th rank, a7 would be a better square.} ( 39. Rc6 Nf4+ 40. Ke3 Nxh3 41. e6 $11) 39... Rb4 $2 {my opponent gets greedy, not counting on the strength of the e-pawn.} (39... Nf4+ 40. Kd2 b5 $15) 40. e6 {the Black rook is now effectively walled off from the central action and the Nd5 is the only thing stopping the passed e-pawn. Black at minimum will have to give up the knight.} Rxb3 41. Nc4 $18 {I believe my opponent missed the full effects of this move, which now threatens to undermine the Nd5 from e3.} a5 {attempting to race her own pawn down the side, but there is not enough time.} (41... Kg8 42. Ne5 $18) 42. Ne3 {now there is no way for Black to exchange the knight for the passed e-pawn and the game is effectively over.} Nf6 43. Rxf6 $1 {this was overlooked as well, I believe.} gxf6 44. e7 a4 45. e8=Q a3 46. Qf7+ Kh8 47. Qxb3 {there are quicker mates, but at this stage of the game you don't get extra points for speed. My opponent, a junior, as is often the case these days, does not resign in a hopeless position, so I just play the easiest moves until mate.} h5 48. Qxa3 f5 49. gxf5 h4 50. Qa7 c4 51. dxc4 b5 52. cxb5 Kg8 53. b6 Kf8 54. b7 Ke8 55. b8=Q# 1-0

07 March 2020

Top two things that hold you back


Progress in chess, as with many things in life, isn't just about gaining new skills and knowledge. It's about identifying flawed or unhelpful practices that are holding you back from greater success, and eliminating - or at least significantly reducing - them. As with any sort of bad habit, the most effective way of tackling them is to consciously adopt new and positive practices. Otherwise, it's too easy for your brain to gravitate back to its old habits, like a well-worn rut in the dirt just keeps getting deeper over time.

While amateur players normally need to work on all aspects of their game, I think picking the top two things that keep tripping you up, then consciously working on them in both training and game situations, can be an effective strategy for speeding up overall improvement. Analyzing your own games over time should naturally highlight what these major issues are, combined with some self reflection, although if you have a coach they should be able to point them out as well. I'll share mine here.

1. Materialism

This is a pernicious problem for many amateurs. Occasionally you may find ultra-aggressive players who never bother counting material and always play for mate, but most people still want to win material and will "count the points" - the traditional "scoring" scheme being 9 for a queen, 5 for a rook, 3 for a bishop or knight, and 1 for a pawn.

Once you get to a certain level of play, I believe using this scheme as part of your thinking process is much more of a detriment than it is a help. At the beginner level, some type of easy-to-understand guide to piece value is needed, so using the standard counting scheme and its variants (3.5 for a bishop and 3.25 for a knight, say) has its place. However, this is a very static way of thinking about the game. Failure to take into account dynamic factors will inevitably hold you back, both strategically and tactically. This is not just a human failing, either, as many computer engines before the most recent modern era - Fritz was notorious for this - had the same problem with materialistic evaluations. (More on the role of engines in a bit.)

One way to effectively combat this in the thinking process is to consciously assess (and reassess) the current and future potential value of each piece. Full details of how to do this is beyond the scope of this post; there are a number of positional/strategic books and lessons available that address this topic. The most basic questions about piece activity, however, will go far. Namely: how many squares does the piece influence? Are they important squares? Does the piece have the ability to move to a better square? Answering these questions will help both strategic and tactical thinking, by highlighting opportunities for your pieces, along with vulnerabilities you may have to your opponent's pieces. This is a major component of prophylactic thinking, which involves preventing your opponent's pieces from reaching their best squares.

An important practical tool in this evaluation is the use of an engine (after the game, of course). Modern engines such as Stockfish, Komodo, Houdini and others are very good at assessing the value of compensation for material, which essentially reflects the dynamic positional value of pieces. I find that Komodo in particular tends to give more weight to non-material factors, which is one reason I use that as my primary engine when analyzing. The engine will not tell you why it evaluates a position in a certain way, so it cannot replace your own study and insight, but it importantly provides an objective evaluation for you to ponder further.

Recognition of materialism as a problem has helped me take some practical measures, including:
  • Deliberately looking for ways to increase piece activity, including via methods like pawn sacrifices. The idea of clearance sacrifices, for example, is common in master-level play.
  • Consciously searching for other major sacrificial possibilities, rather than automatically suppressing them as part of the thinking process. This reveals opportunities that will otherwise be missed, for example in Annotated Game #5 (First Sacrifice). This is just as important to do when thinking of your opponent's possibilities, as in Annotated Game #233 (Boden's Mate).
  • Paying more attention to the comparative value of pieces when making (or avoiding) exchanges. Piece swaps are often taken for granted, as players assume that if the overall "count" is the same, then exchanges always have a neutral value. This is one way that masters end up beating amateurs on a regular basis, by better recognizing the longer-term value of the pieces (including pawns) that are left. My simul game versus GM Sam Shankland is a good example.

2. Laziness in calculation

The best training advice I have ever received (from a martial arts master) is "don't be lazy". This is especially important when calculating as part of the thinking process. This does not mean calculating endless variations every single move; rather, it's important to recognize when critical positions are reached. At that point, the variations being calculated have to work, otherwise the game's outcome will be affected.
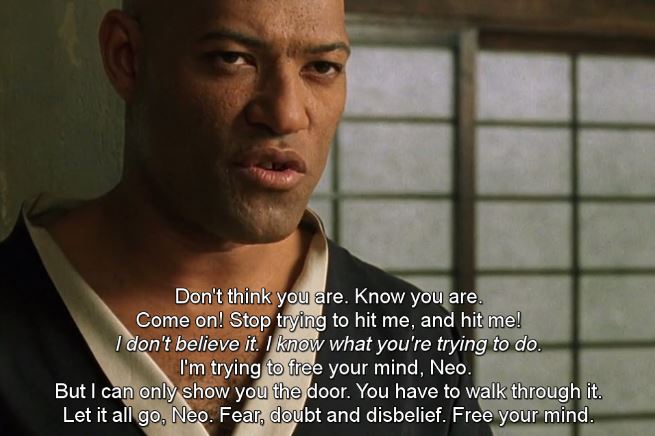

Another meme-worthy formulation of this is "Don't think you are. Know you are" from The Matrix. In other words, don't think you know what will happen if you make a critical move, make the effort to know what will happen. This requires laziness to be banished and increased focus and energy applied. Fear and doubt can enter into the process as well, either when attacking or defending in a critical situation. It's better to put those things aside and focus on determining the reality of what will work and what will not.

Consistent application of a routine thinking process that involves blunder checking and looking at your opponent's resources is also part of this idea, of not being lazy. It's been too easy for me to over-focus on my own possibilities and then, unless I force myself to ask "what are my opponent's threats and ideas", get caught out by something unexpected.

Another aspect of laziness is stopping prematurely when reaching a key future position during calculations. This is normally a result of either dismissing a position as not being viable, when in fact it is, or the opposite problem, which is believing that the position is won/good for you, when in fact your opponent can bust the line with their next move. This means that you have stopped "one move short" of what should be done. Eliminating this problem is not easy, because of the inherently difficult nature of calculating and visualizing multiple potential future positions, but identifying when to make the extra effort and then applying it can go a long way to improving quality of play and your results.